So, I haven't worked on my plane in a looong time It`s been on my mind again recently, so I`m going to post an update for the stuff that I did before the big bout of procrastination.
When we last left, I was about to start applying the fiberglass to the wings of the plane:
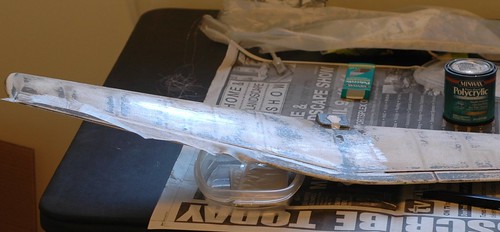
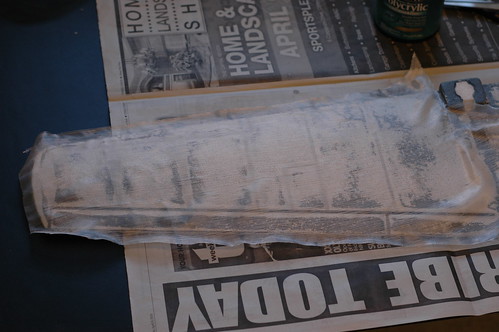
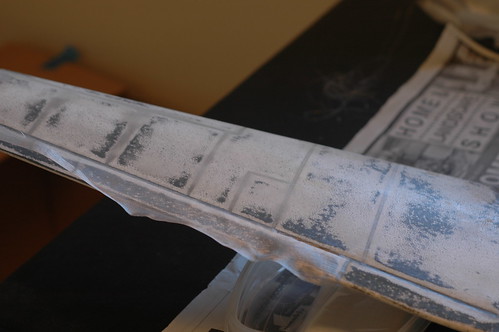
I remember this going pretty well. There was a LOT of sanding, applying more fiberglass, more sanding, spackling, more sanding, and so on. It all got a bit tedious, but the output was pretty good. I thought I had pictures for the various parts of the build, but I'm currently unable to locate them.
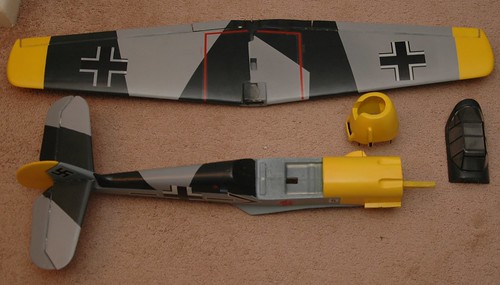
I also thought I had pictures of me painting the plane, but they are also MIA. Sorry about that.
I used the following process:
- Applied 3 layers of fiberglass, sealing with Minwax Polycrylic (painted on with a brush) and lightly sanding in between each application.
- Applied extra minwax, sanded again, and a light layer of spackle (also sanded afterwards again).
- Applied a primer coat of gray Createx paint (mixed from white and black) with my airbrush.
- Masked off everything that wasn't yellow, and applied the yellow paint. A number of layers were required to get a good finish. There was light sanding with high-grid sandpaper in between applications.
- Masked off the yellow areas, and applied a base-coat of light blue-gray (the base color for the plane). This also had a few layers with sanding in between.
- Masked (again) the area with the dark green sections and painted those. You guessed it, more sanding in between.
- Applied the decals and did some (bad) detail painting with a hand-brush. Decals are a HUGE pain.
- Followed up with a few layers of polycrylic for protection (sanding!).
Some things I recall from the process:
- My apartment kitchen is not the best place to do airbrush painting. It`s pretty small, and not very well ventilated. Also it makes it difficult to eat dinner in there.
- If you`re mixing paints to color match, make waaaay more than you expect to need, and keep it in an airtight container. That way, when you need to touchup a spot (say, if you overspray somewhere, or accidentally markup the painted area), you won't have to try to figure it out all over again (I had to do this).
- Getting bright yellows is a pain. I should have been more thorough with the primer on the light areas, or more careful not to mark them up with markers at all.
- Don`t drop your airbrush on a tile floor, it tends to break.
- You can never spend enough time sanding and spackling beforehand.
- Doing details is hard.
- Apply decals BEFORE applying polycrylic.
- Cutting the polycrylic with some water makes it spray much nicer through an airbrush (same with the Createx paints). I used about 50-50 for the polycrylic, and about 80% paint : 20% water for the paints.
- It is absolutely terrifying putting a swastika on anything.
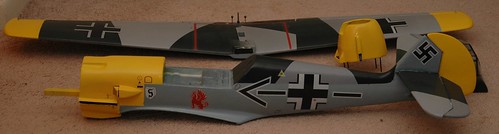
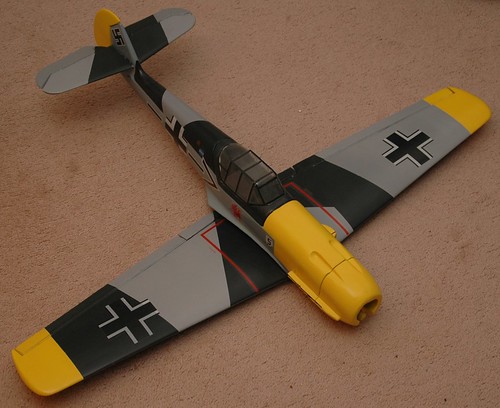
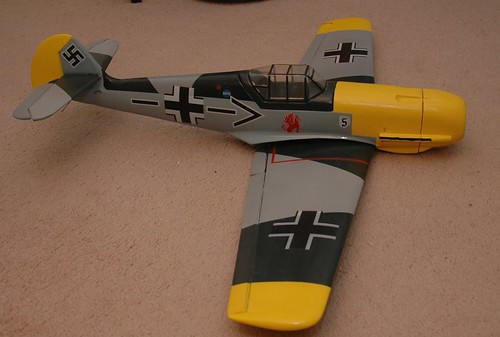
Here's some pictures of the fully painted and decal`d plane:
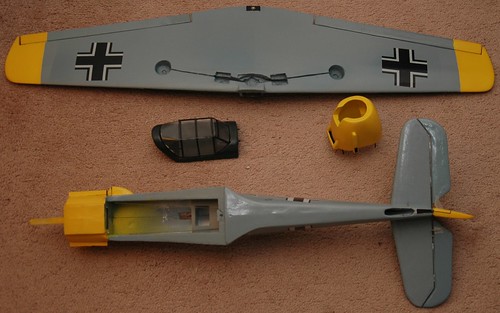
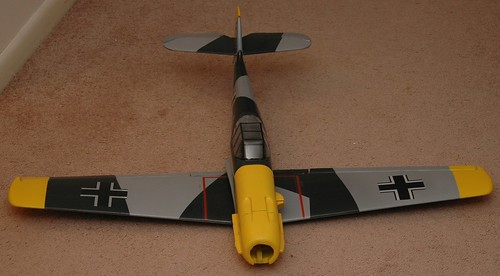
You can see that I sealed up the hole for the servo for the retracts (it turns out I mis-calculated and the old hole wasn't going to work). I'm going to hold off on them for now, since I've been so slow to implement anything, I just want to get something done.
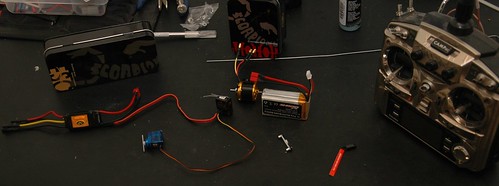
Currently, I'm working on getting the electronics sorted out:
Hopefully it won't be another year until I post again :)